Have you been wondering how to make a stencil on Cricut? You are in the right place. Your Cricut machine is the perfect cutting machine for making stencils because it can take all the effort out of the cutting process and ensure you’ve an ideal, professional-looking stencil every time.
Stencils are versatile, and there’s a lot you can do when using them, including all DIY home decor projects, such as painted pillows, glass etching, painted wooden signs, wall art, and custom T-shirts. The best part is that your Cricut machine is perfect for making stencils as it can cut out complex designs quickly.
This post will guide you on how to make a stencil on Cricut. It’s hard to figure it out on your own. But once you know the basic steps in sequence, it is actually easy.
Read more:– Cricut.com/Setup
What Supplies Will You Need To Make a Stencil On Cricut?
Below are the supplies you will need to make a stencil on Cricut.
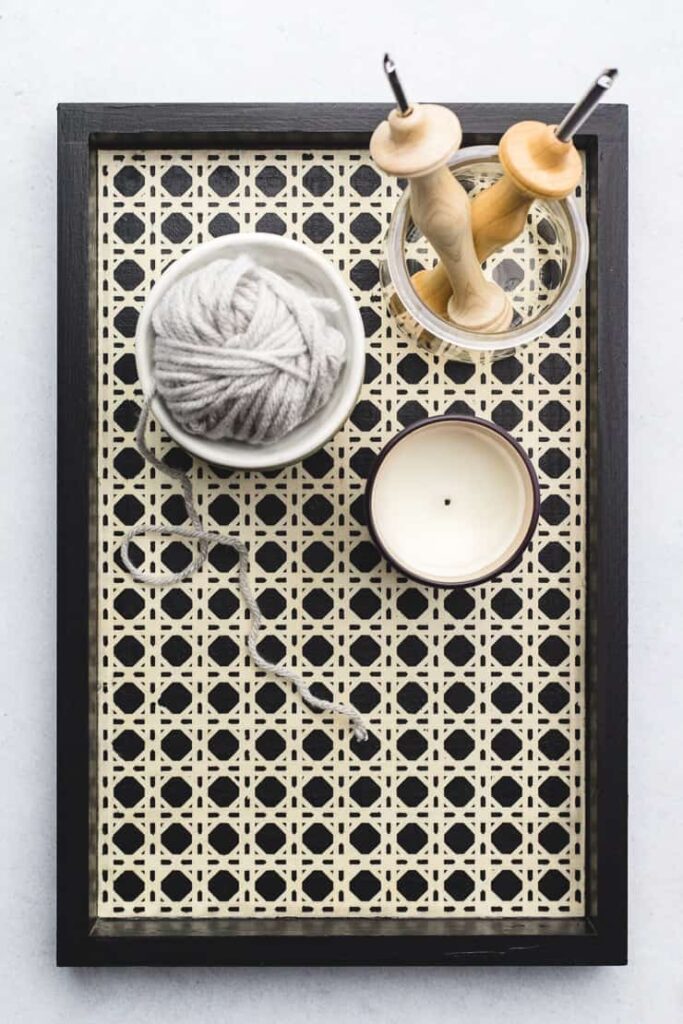
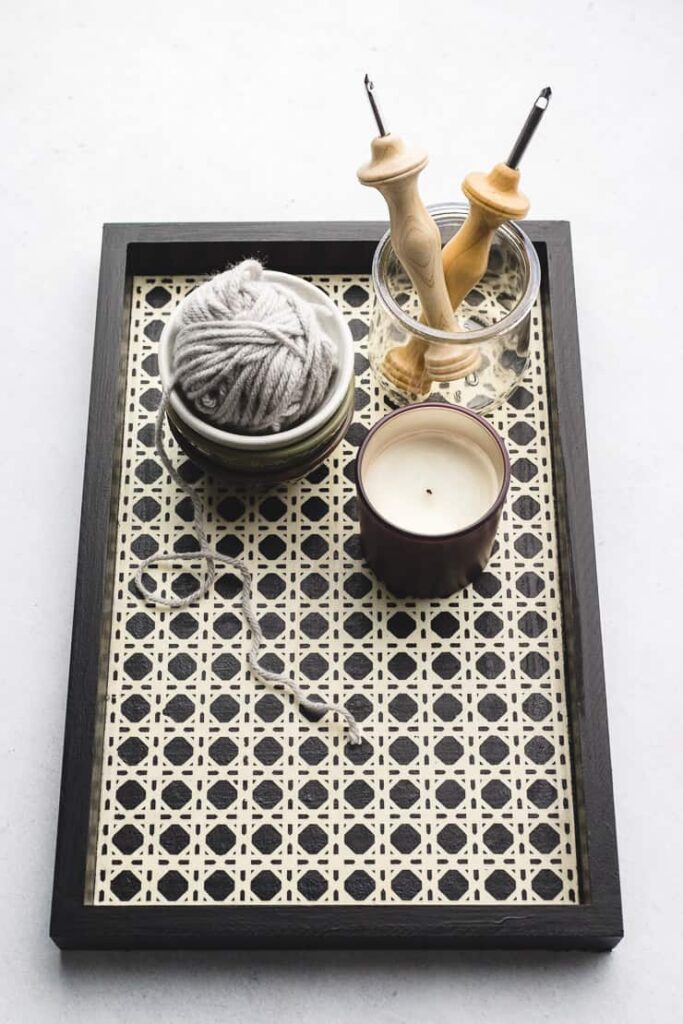
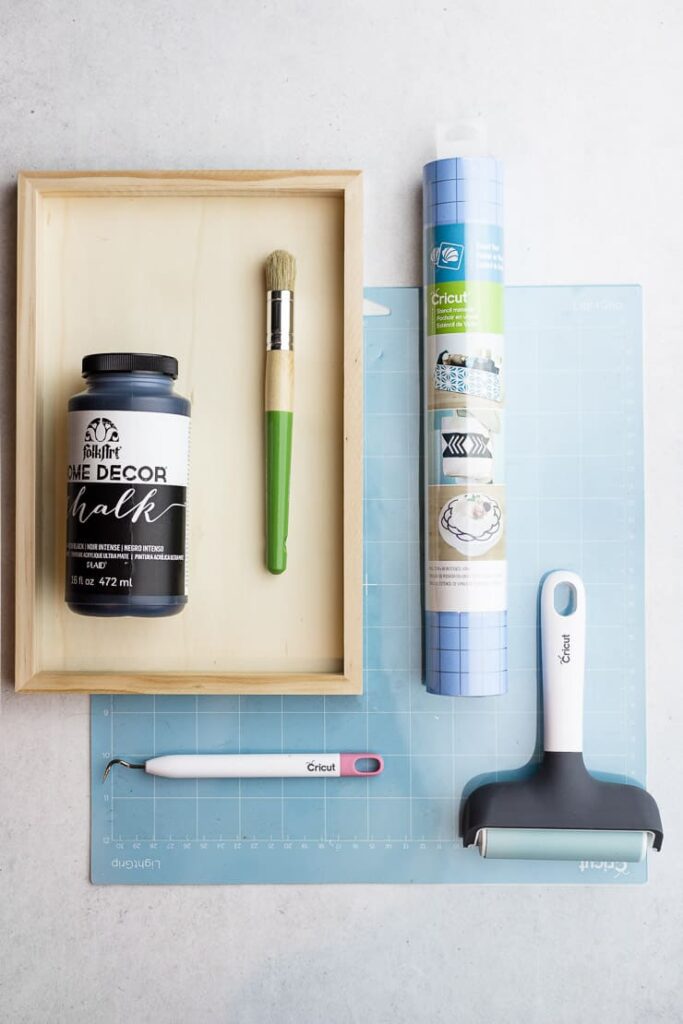
- An empty item – like a wooden tray
- Stencil Vinyl – we will be using Cricut stencil vinyl, but we will also give a few other options.
- Transfer tape.
- Paint – we will be using chalk paint in this project guide.
- A stencil brush or a sponge brush.
- Cricut Machine – we will be using a Cricut Maker machine, but the Cricut Explore Series and Cricut Joy will work as well.
- Scraper tools, weeding tools, and a brayer.

Cricut Guide: How To Make a Stencil On Cricut
There are 4 basic steps to making a stencil on Cricut. Kindly follow the steps given below:
Step 1: Create Stencil at the Cricut Design Space
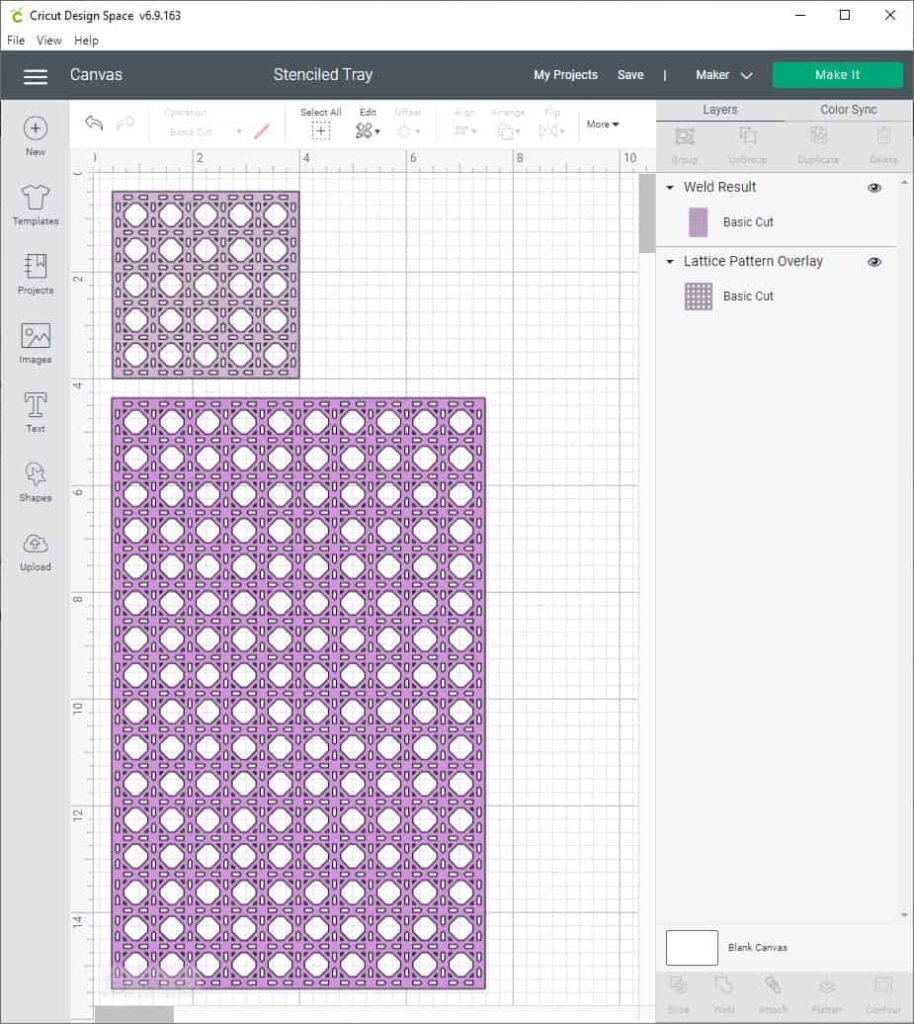
First, you must select an image you want to stencil. Then choose a design from the Cricut Access library, upload a stencil SVG file, or you can also create your own stencil design in the Design Space.
Search for Cricut Access: You can search the vast images library at Cricut Access for stencil projects. If you want good stencil images, search for “stencil” or “pattern.”
We will use a free image – “Lattice Pattern Overlay,” from the “Edge to Edge” image for this project guide. We will repeat the images and weld them together to make one larger design.
Upload Your Image: Also, you can be able to upload your stencil image to Design Space.
Create a Stencil in the Design Space: Another option you can design your stencil image in the Design Space. You can create a monogram with a stencil, a few letters, a quote, or any mix of those elements.
If you want to reapply or reuse stencils, always remember to maintain all stencil images connected. All the design details must touch if you cut the stencil vinyl as one piece.
Step 2: Cut Your Stencil Vinyl
Once you have completed your stencil design, prepare to cut your vinyl.
First, you must put your stencil vinyl on a StandardGrip or LightGrip cutting mat. We like to roll the vinyl with a Breyer tool to ensure it’s flat, smooth, and attached well to the cutting mat.
Next, tap on the button to load the cutting mat into your cutting machine.
Then, go back to the Design Space, and send the file to your machine. Here’s how to do it:
- First, you have to press on the green “Make it” on your upper right side.
- On the Prepare screen, check if your design looks correct. If so, tap on Continue.
- On the Make screen, tap on Browse All Materials menu and click on Stencil Vinyl. Note: If you are using Explore Air 1 or 2 machines, change the Smart Dial to Custom to access the Browse All Materials menu.
Now, your machine is ready to cut out your design. Check properly that your fine-point blade is loaded into your machine and tap on the Go button to cut out your design.
When your machine has completed cutting, take off the cutting mat. Now it’s time to move your design.
Step 3: Apply Your Stencil Vinyl
Be ready to apply stencil vinyl to the surface of your project. Here’s how:
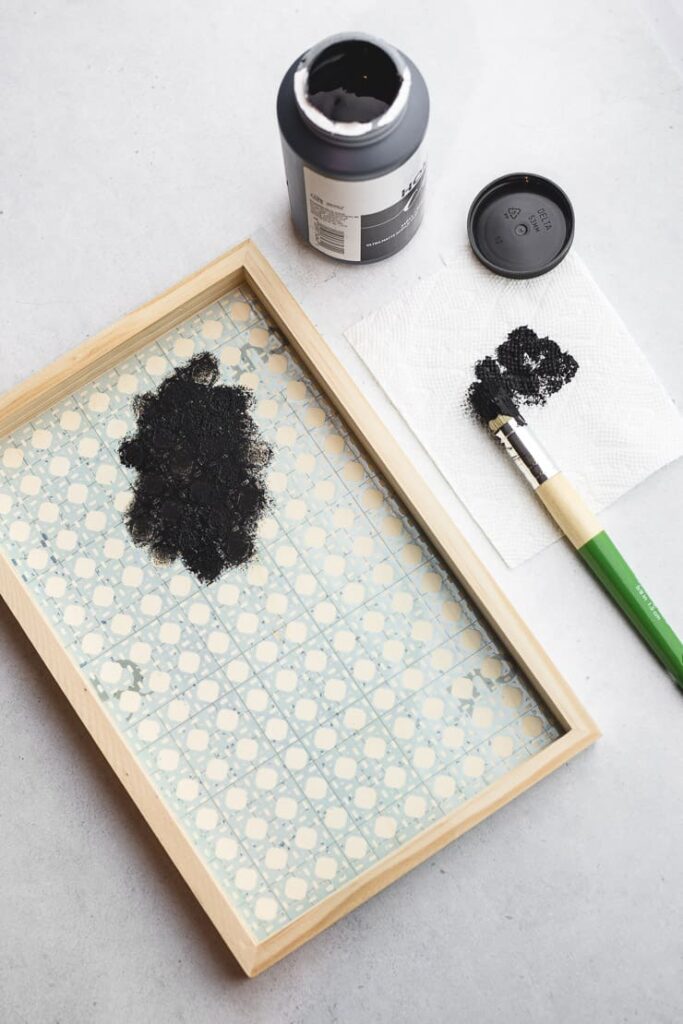
- First of all, ensure your project surface is dry and clean. Then, carefully put your stencil vinyl on the project surface. Take your time applying it exactly how you want the final image to look.
- Now, use the Cricut scraper tool, or you can use your old gift card to burn stencil vinyl to the project surface. Start burning in from the center part, then move to the edges of your image. Burning edges will make a proper seal and stop your paint from bleeding under the edges. Since stencil vinyl is transparent, you can see where it’s making a good touch, where bubbles can occur, or where you need to burn more.
Using the transfer tape, follow the same burning steps. After burning, carefully peel off those transfer tapes, leaving your stencil on the project’s surface.
Step 4: Paint Your Stencil Vinyl
Now your stencil vinyl has been applied, it is time to paint your design.
Use a stencil brush, or you can use a sponge brush to apply a light paint coat over your stencil vinyl. That paint will pass via the cut-out areas of your stencil vinyl, moving your design to the project surface.
Apply more thin paint coats as needed for better coverage. Remember that it is more useful to apply 3 thin coats than 1 thicker coat to stop the paint from bleeding.
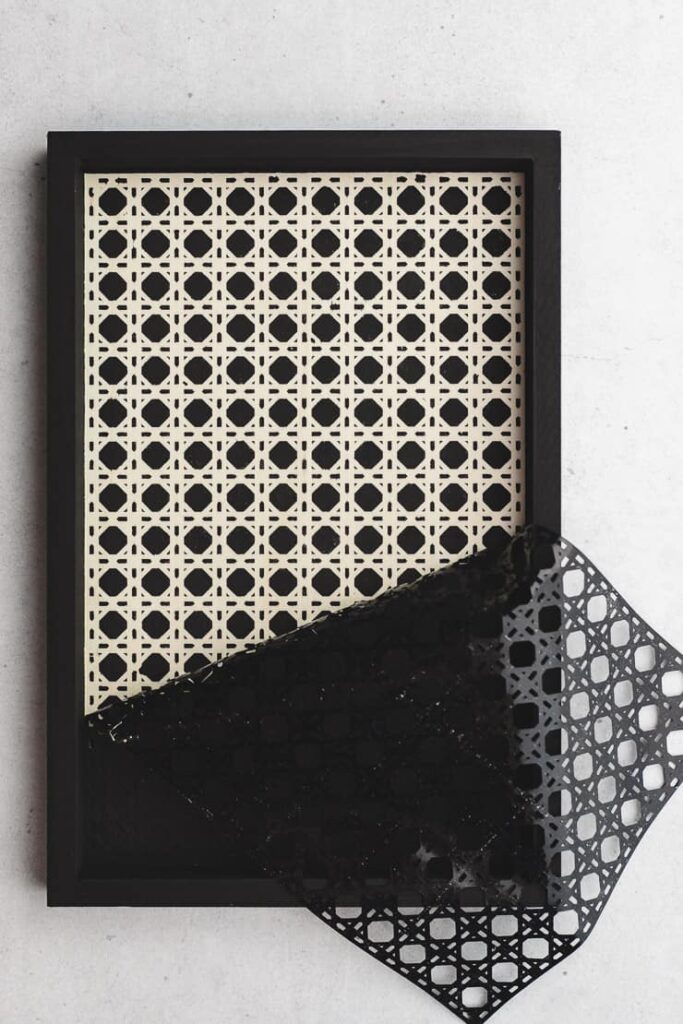
After the paint has dried, carefully remove your stencil vinyl. You can transfer your stencil vinyl to a new place and reuse it at this stage.
If your stencil vinyl pulls or rips out when you remove it, then use your machine to cut another stencil vinyl.
Here are some more tips and tricks when making stencil projects:
- You can use a stipple brush or a sponge brush to apply paint.
- With stencil vinyl, a small amount of paint goes a long way. Wipe off any excess paint by dabbing the brush on a paper towel.
- Wipe the brush on your stencil vinyl in an up-and-down movement. Please don’t use your brush to paint side-by-side, as it can push the paint to run under the edges of your stencil vinyl.
- Before removing your stencil vinyl, always wait for the paint to dry to stop bubbles or spots.
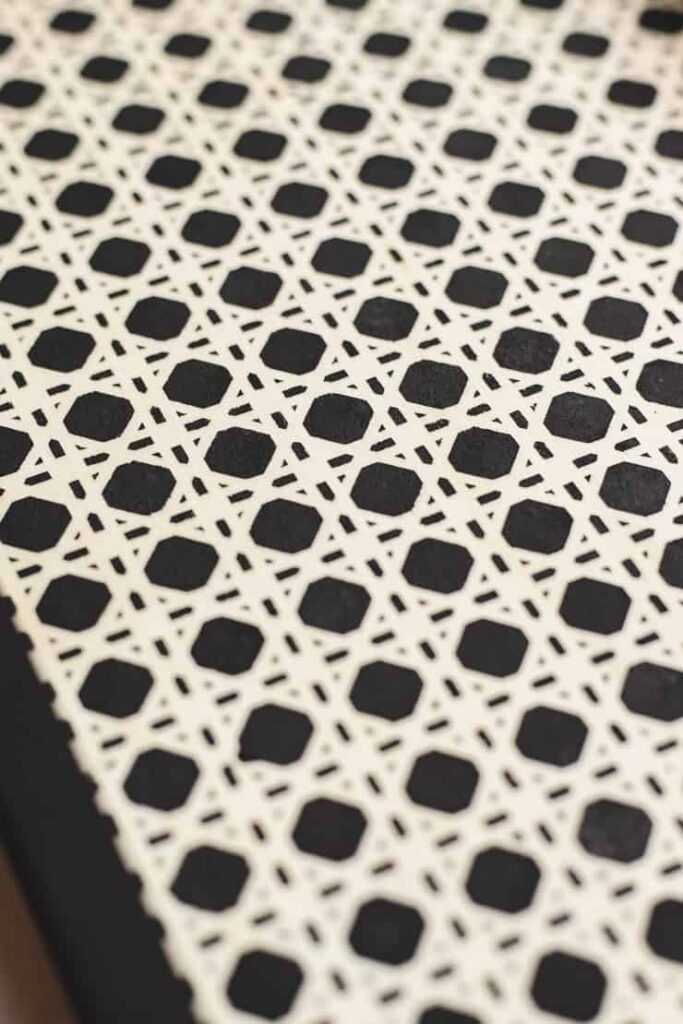
You can fill your piece with a clear coat when you complete your stencil vinyl. For wood trays (as shown in the picture), you can use water-based polyurethane to coat your stencil vinyl.
So, this is a complete guide on how to make a stencil on Cricut. Anyone can make a stencil on Cricut at home. You should definitely try – as you can see, creating a stencil on Cricut is easy.