When I first got my hands on my new Cricut machine, I was excited but also a little bit nervous. It had so many buttons, tools, and different mat types that it felt overwhelming. Instead of spending hours on confusing manuals, I decided to learn by doing, and that’s how this blog came to life.
Here, I will show you exactly “how to use a Cricut machine” with a beginner-friendly project: making bookmarks. So, if you are not sure where to start, don’t worry – I’ve got you covered.
Whether you are into personalized mugs, vinyl decals, or greeting cards, this easy step-by-step guide will help you get comfortable with your machine while making something fun and useful. So, plug in your Cricut machine, and let’s craft together!
What You’ll Require Before Using a Cricut Machine
Here’s what you will need before using a Cricut cutting machine:
- Cricut machine (Maker, Explore, or Joy)
- StandardGrip mat
- Blades
- Pens & markers
- Cricut Design Space Software
- Transfer tape
- Weeding tool
- Red cardstock paper
- Vinyl
- Iron-on/ HTV
Note: When selecting a design, consider the materials needed and the project’s complexity.
How to Use a Cricut Machine: 5 Simple Steps
Cricut Design Space is a software program that allows you to design and customize your designs according to your needs. Before initiating the complete process, you must have:
- Installed Cricut Design Space
- Created an Cricut account
- Completed your Cricut Machine Setup.
Step 1: Open Cricut Design Space
- Begin by opening Cricut Design Space, the software that controls the machine. Click New Project on the left side.
- Next, a blank canvas will appear on your screen. Browse ready-to-make projects or create your designs from scratch using ‘Cricut Design Space Tools‘ like Text, Shapes, and many more.
- Use the Image Library search bar to type “pencil” and browse through the available designs. There will be numerous images. Select what you want.
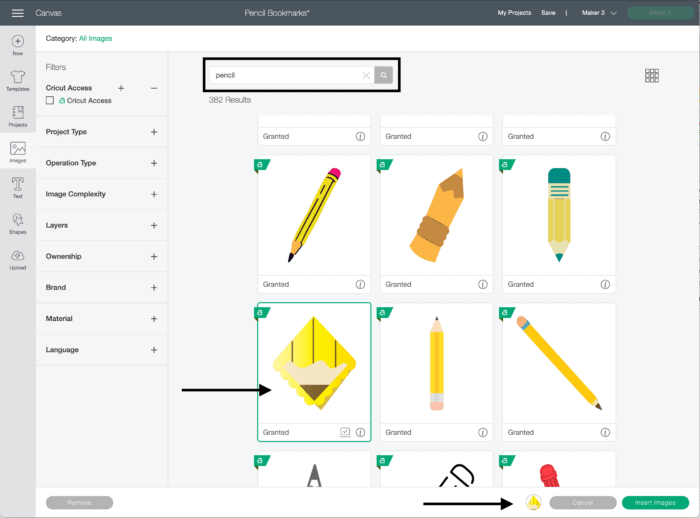
- After clicking on your desired image, click the green Insert Image button.
Step 2: Customize Your Design
- On the right-hand side of the Layers panel, select each element and adjust the color using the color menu. I am using Red.
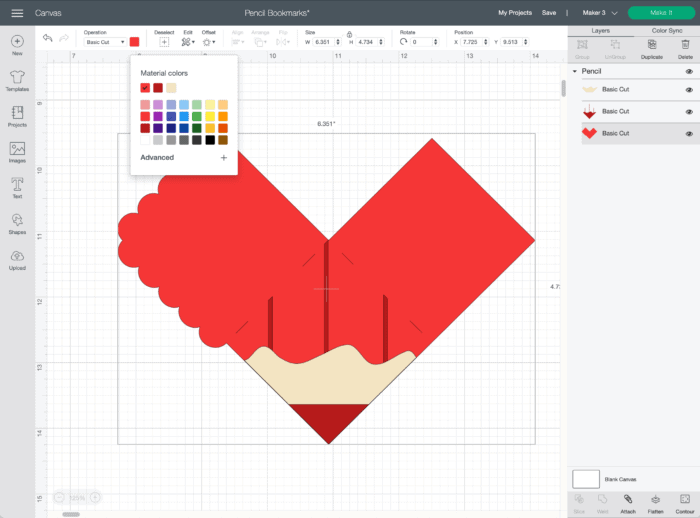
- Once you’re satisfied, click the “Make It” button at the top.
Note: Select ‘On a Mat’ if using a Cricut Explore 3, Maker 3, or Joy, when asked.
Step 3: Prepare Your Materials
- Select the appropriate cutting mat for your material (LightGrip, StandardGrip, or StrongGrip mat).
- Choose the 12×12 cardstock size to use the full sheet.
- Adjust the number of copies you want at one time. I am increasing the number of project copies to 6.
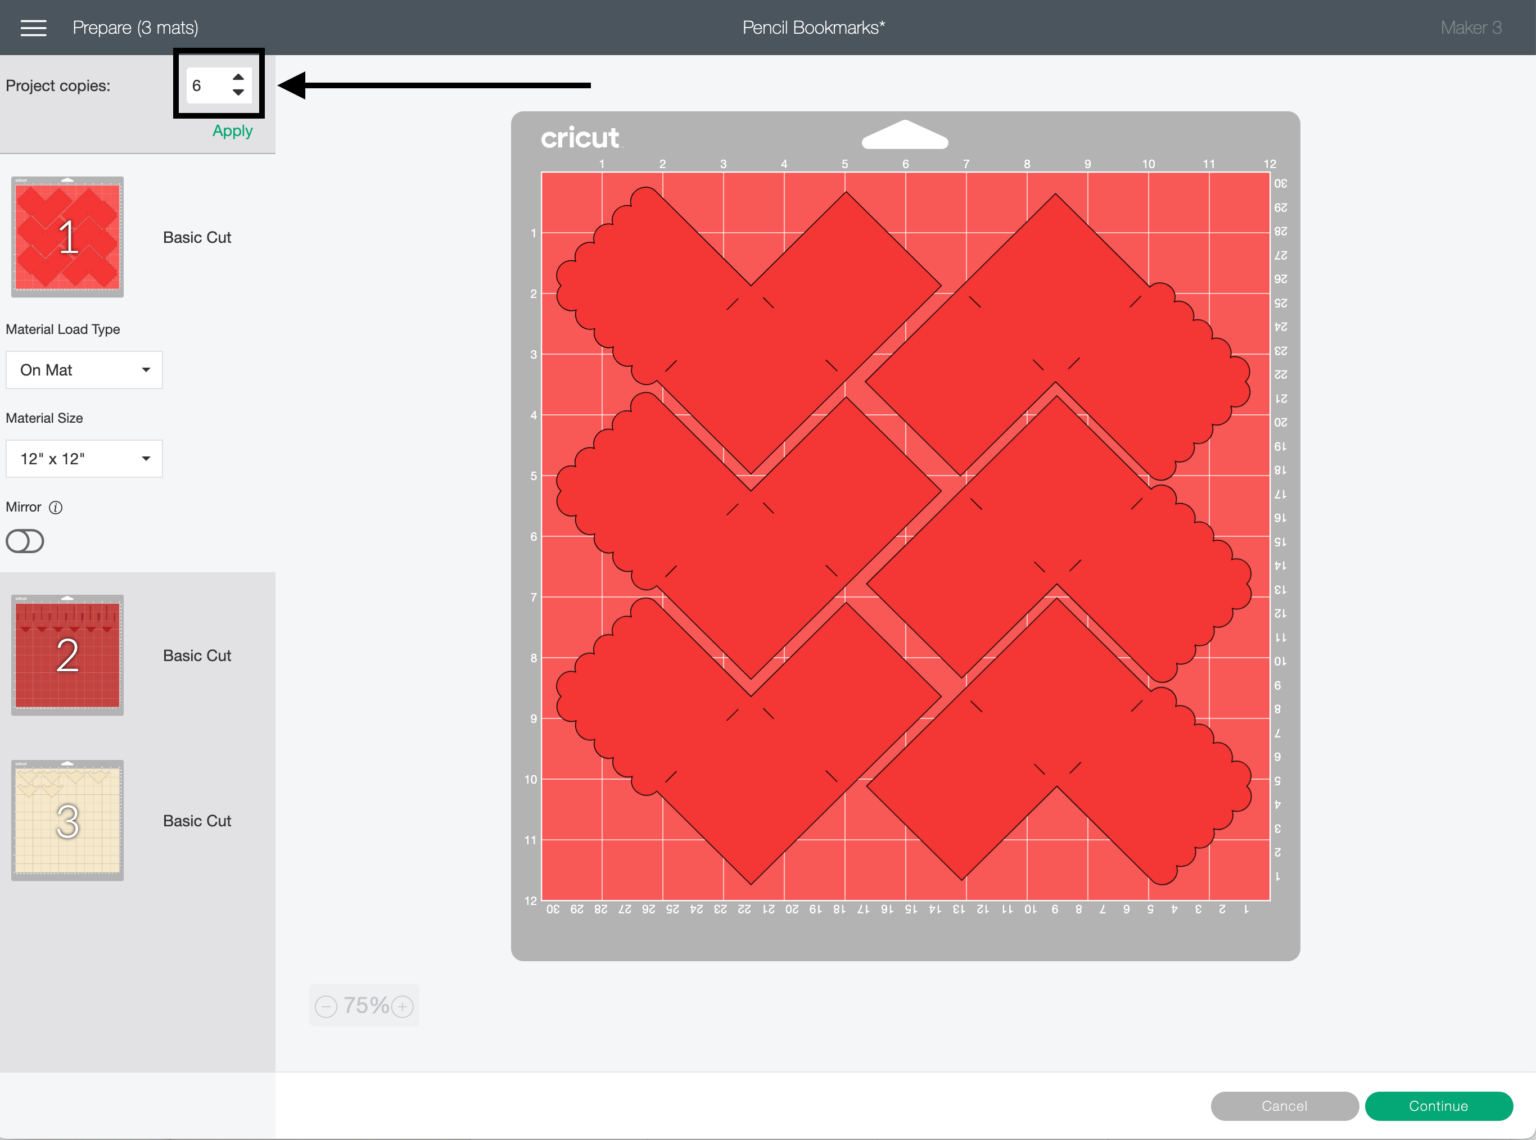
- Once you are satisfied with your design, click the Continue option.
Step 4: Load Mat and Start Cutting
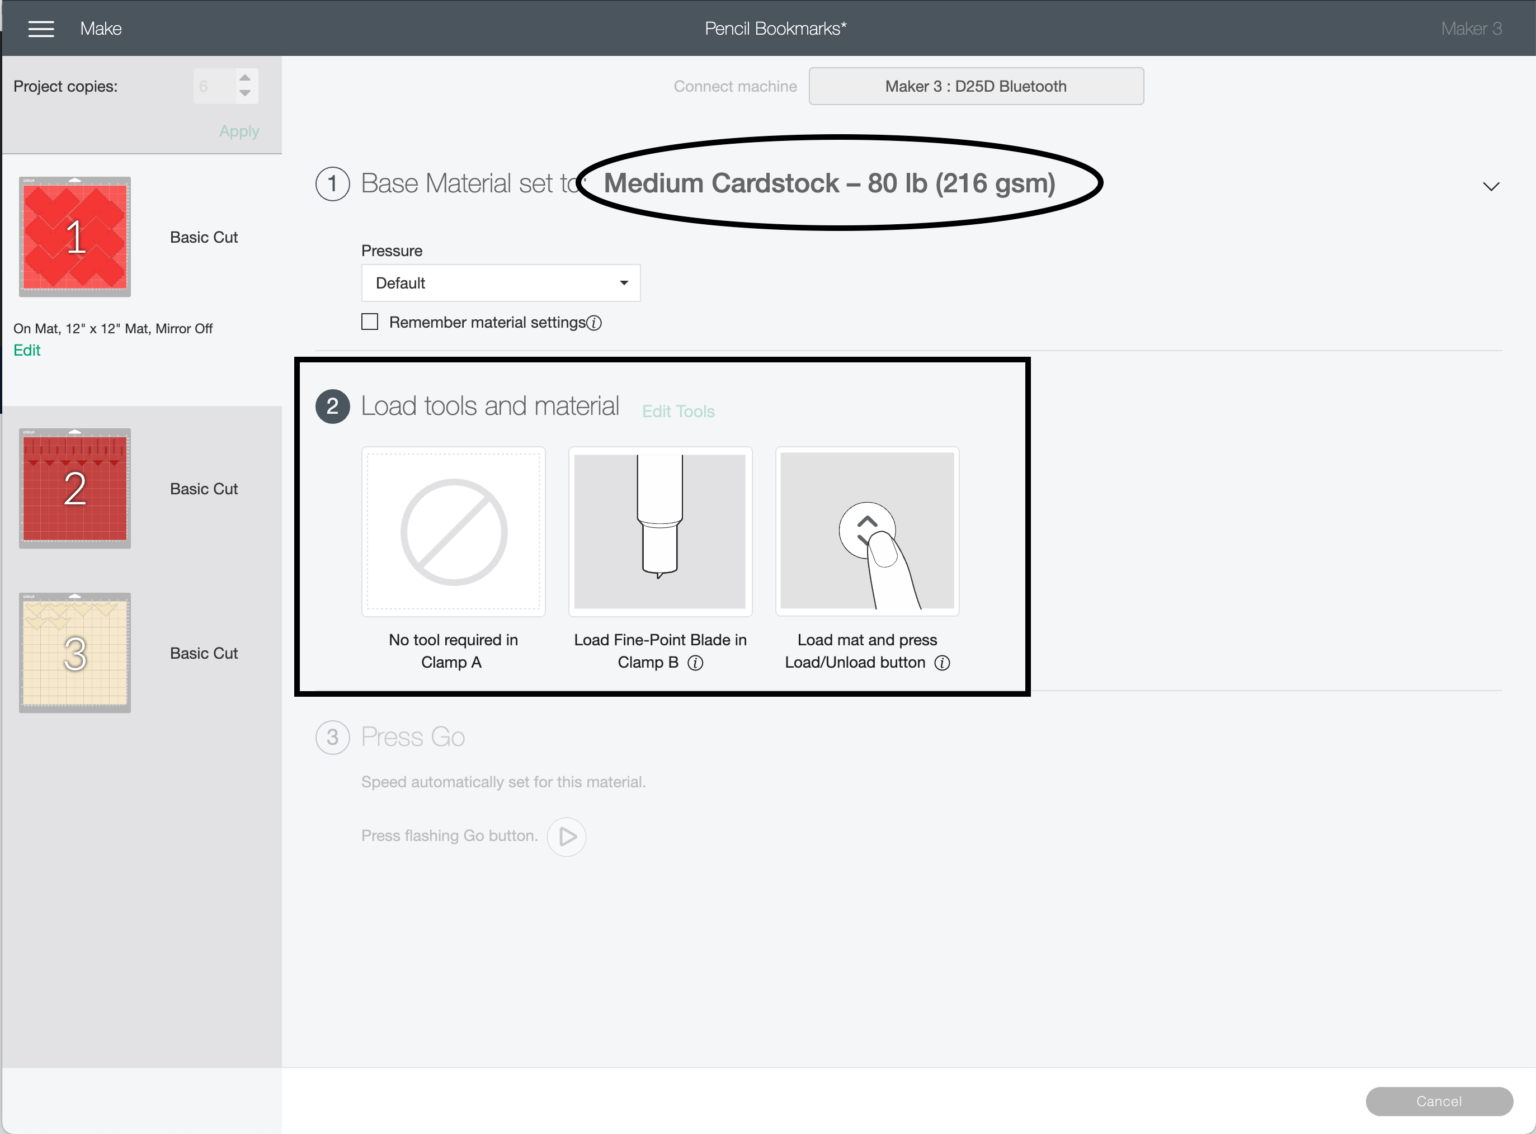
- On the next screen, select Medium cardstock as your material. If necessary, click on Browse All Materials to find your specific material.
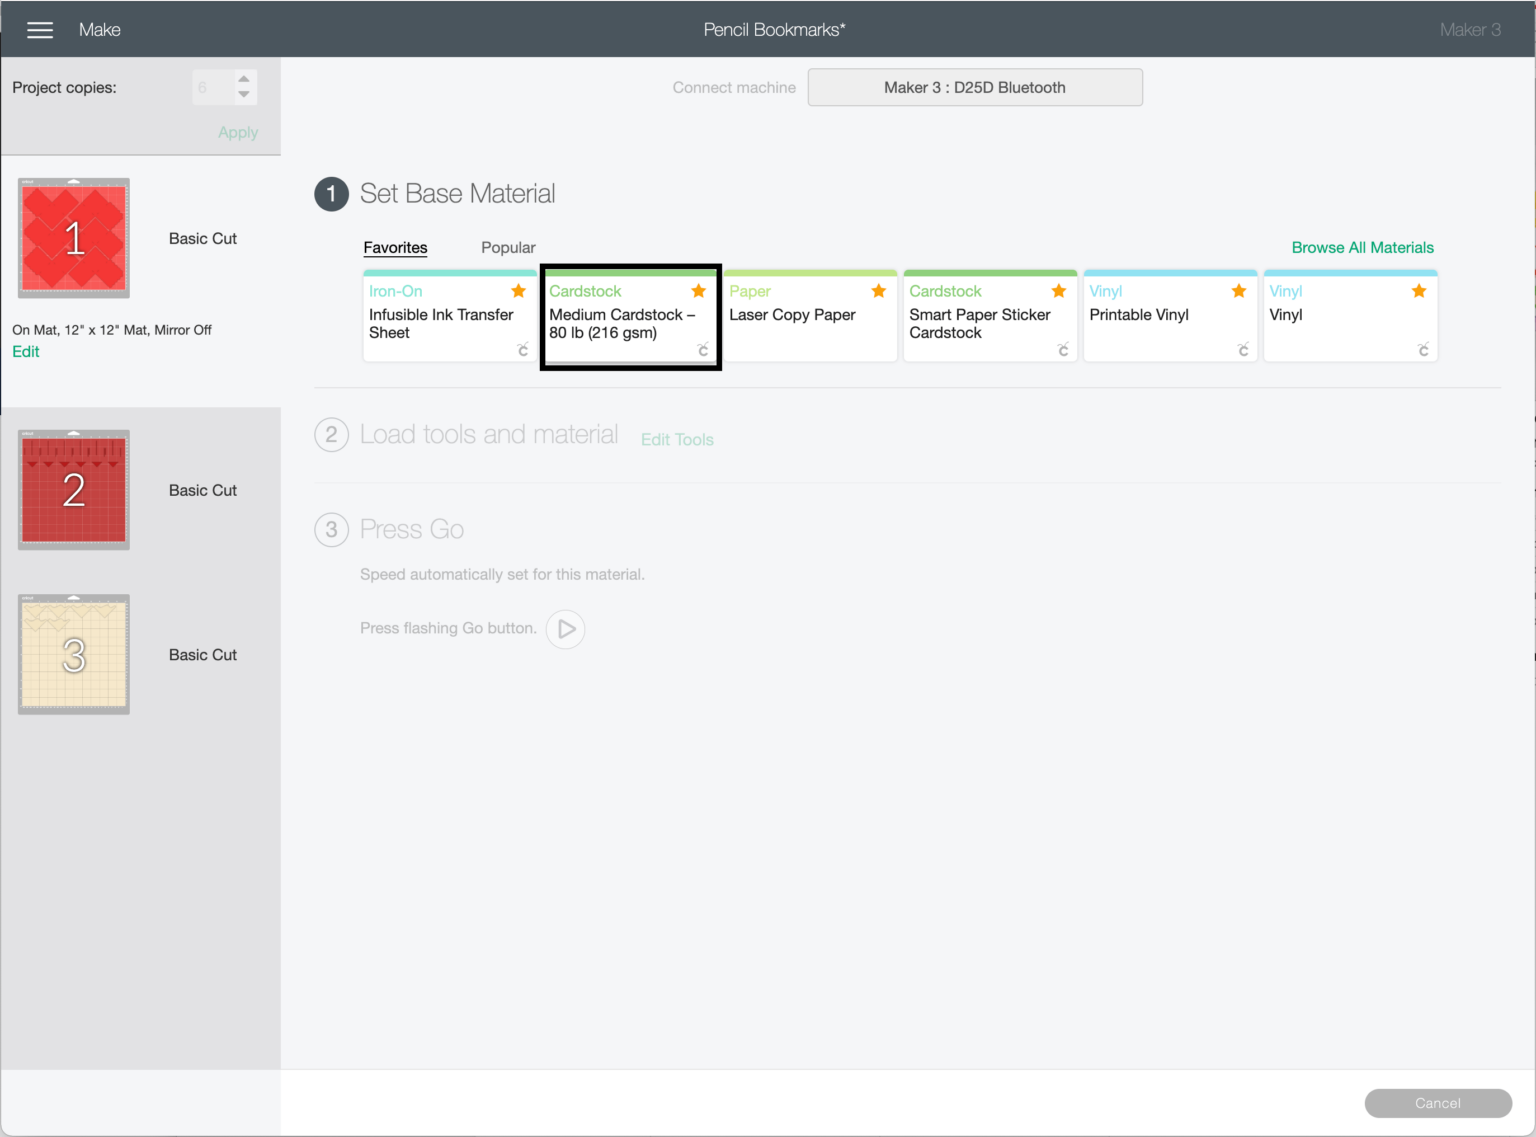
- Don’t skip the next screen easily, as it provides important information, such as the selected material, tools, and blades to use, and which buttons to press.
- In case you selected the wrong material, you can change it by simply clicking on the material name.
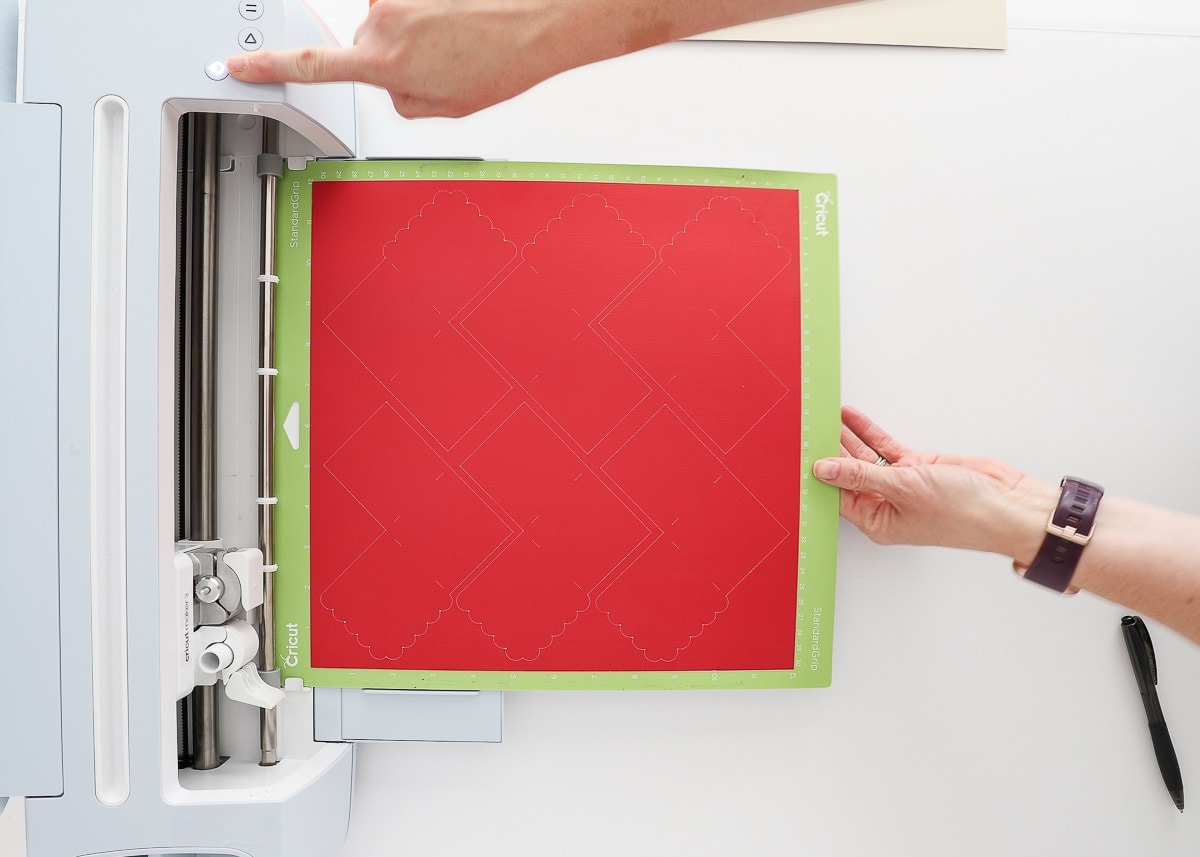
- Place your materials on the mat, ensuring they are aligned with the printed grid on the mat.
- Make sure your material is slightly larger than your design to avoid misalignment.
- Insert the loaded mat into the machine.
- Press the flashing “Go” (Cricut logo) button on your machine to start cutting.
Note: If using a Cricut Explore, use the machine dial to select the material you are using.
Step 5: Remove Cardstock From Mat and Assemble
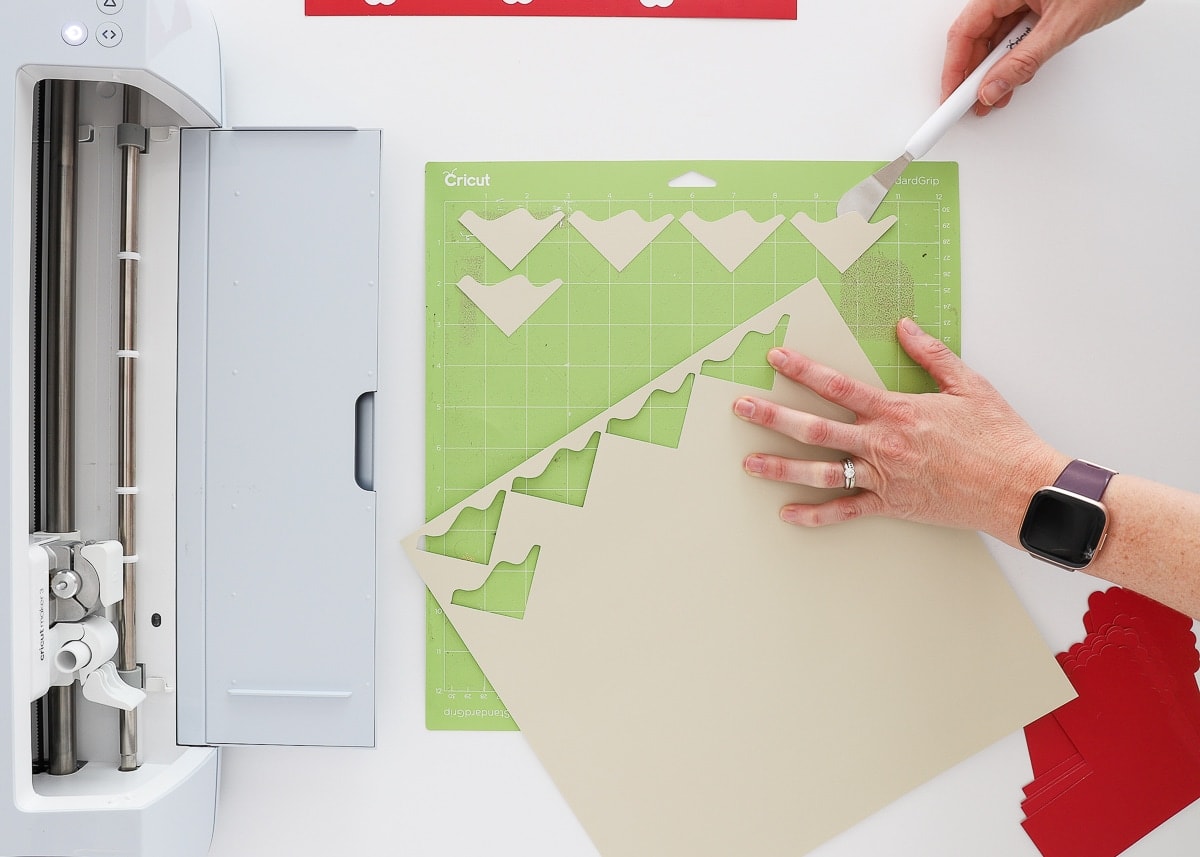
- Once the cutting is complete, unload the mat from the machine.
- Remove your cut design from the cutting mat carefully. Keep the paper side down and gently bend the mat to release the cardstock. This helps prevent curling and keeps the design intact.

- Use the spatula tool to gently remove them from the mat, and carefully trim the excess paper around your designs. This technique is recommended while working with intricate designs.
- Apply glue to the cut pieces and assemble your project as desired.
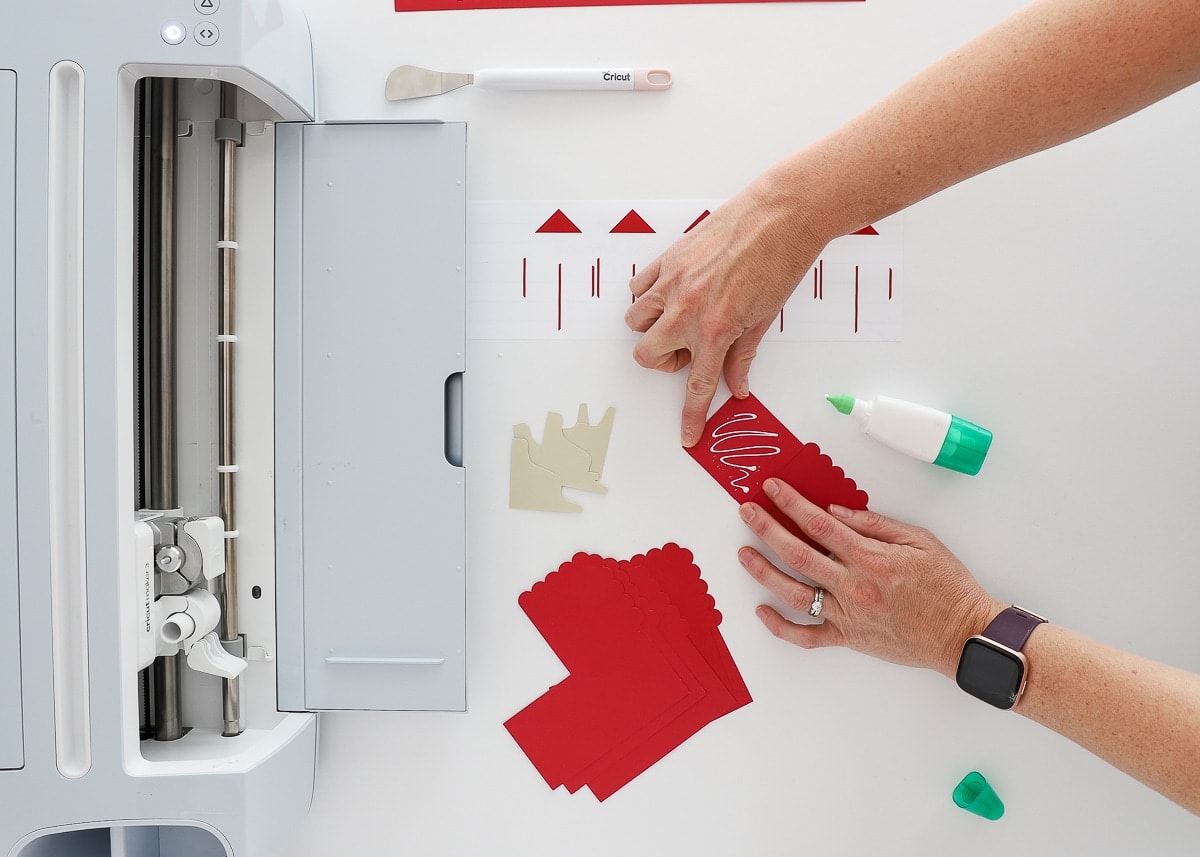
I know, now you’re feeling super confident with your Cricut machine and are ready to make more of them. Use different-colored cardstocks and create bookmarks in various colors.
Frequently Asked Questions (FAQs)
How Does a Cricut Machine Work for Beginners?
Cricut machines are crafting tools that use Design Space software to create and send designs to the machine, which then precisely cuts various materials. Beginners can start with pre-made projects or simple custom designs, and the machine guides users step by step, making it easy to select materials and cutting settings.
How Hard is it to learn to Use a Cricut Machine?
Learning to use a Cricut machine is not that difficult, but it does require some time and practice to become proficient. Cricut machines are designed to be user-friendly, with intuitive controls and a straightforward setup process.
You will use the Cricut Design Space Software to create and send projects to the machine. It can be initially overwhelming, but numerous guides and videos are available to help you learn the process.
Can you Make Stickers with a Cricut Machine?
You can design your own stickers using text and images in Cricut Design Space, then print and cut them using compatible materials like sticker paper or printable vinyl. You can import your images or use the images and text tools within Design Space to create your designs.
You can use these types of stickers to decorate notebooks, planners, and gifts, or add a personal touch to any other creative project.
Why Is My Cricut Maker Not Connecting?
To ensure proper connectivity of your cutting machine, follow the instructions given below:
- If using a computer, ensure your Bluetooth adapter drivers are up to date.
- Keep your Cricut Machine within 15 feet (4.5 meters) of your device for a stable connection.
- Try moving your machine and device away from other electronic devices as they interfere with Bluetooth.
- Remove any existing pairings and then attempt to pair it again.
- Make sure your computer or phone is connected to a stable Wi-Fi network.